

Sep 2026 Preventing Paint Peeling on Kitchen Cabinets
Table of Contents
- Why Paint Peels on Kitchen Cabinets
- How to Clean Kitchen Cabinets Before Painting
- Surface Preparation: Sanding and Scuffing
- Best Primer for Kitchen Cabinets
- Applying Paint and Ensuring Adhesion
- How Long Does Kitchen Cabinet Paint Take to Cure
- Common Paint Failure Mistakes to Avoid
- Long-Term Maintenance Schedule
- Frequently Asked Questions
Last Updated: September 27, 2026
Why Paint Peels on Kitchen Cabinets
Paint peels on kitchen cabinets because the surface wasn’t properly prepared before application. Most cabinet paint failure happens within the first 12 months, and it’s almost always preventable.
Kitchens are harsh environments, heat, moisture, grease, and temperature swings stress paint coatings. Poor initial bonding guarantees failure.
Root causes: unclean substrate, unscuffed surface, or wrong primer. Paint sits on top without gripping, then lifts at edges within weeks.
Common peeling triggers:
- Grease and wax residue blocking adhesion
- Glossy cabinet finishes not scuffed or sanded
- Standard primer used on laminate or veneer cabinets
- Insufficient curing time before the kitchen gets heavy use
- Heat exposure before paint fully hardens
Preventing paint peeling requires proper surface preparation, the right primer, and patience during curing. Meticulous preparation ensures cabinets stay flawless for years.
How to Clean Kitchen Cabinets Before Painting
Cleaning is the foundation of preventing paint peeling on kitchen cabinets. Grease, dust, and wax residue create an invisible barrier that prevents paint adhesion.
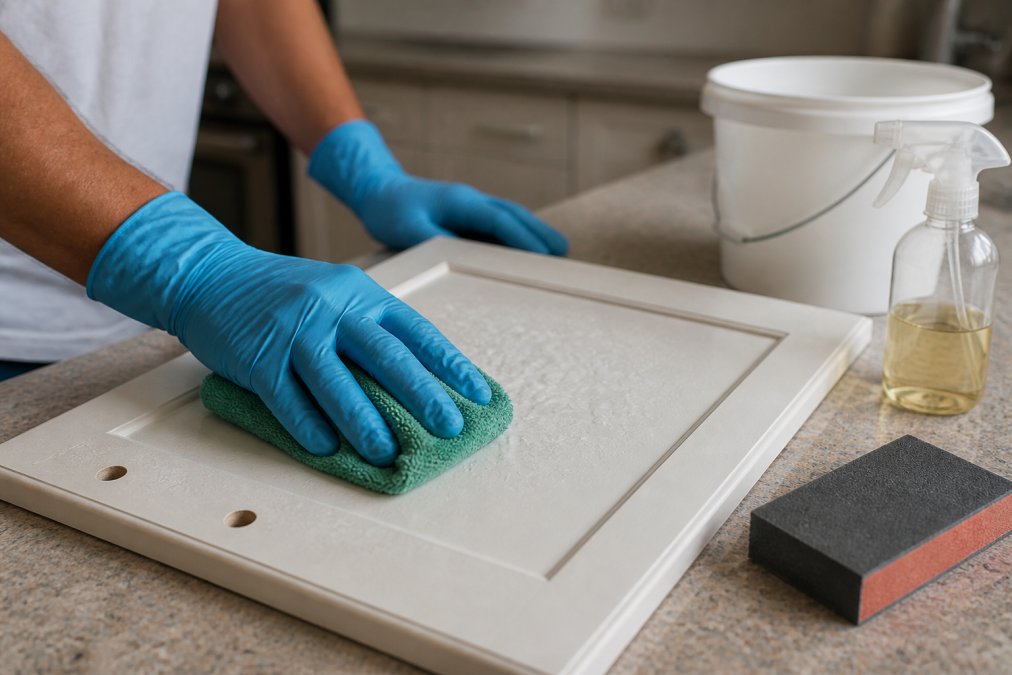
Degreasing and Removing Wax Residue
Use a degreasing solution like TSP (trisodium phosphate). Mix according to instructions, apply with a cloth, let sit a few minutes, then wipe thoroughly with a clean damp cloth to remove all residue.
Work section by section to prevent solution from drying. Pay special attention to edges, handles, and crevices where grease pools, these become weak points where paint lifts first.
Using TSP and Microfibre Cloths
Use one microfibre cloth for TSP application and a separate cloth for rinsing to prevent redepositing grease. Let cabinets dry completely, moisture trapped under paint causes adhesion failure and blistering. In humid conditions, allow extra drying time or use a hair dryer on cool setting.
Surface Preparation: Sanding and Scuffing
Scuff the surface with sandpaper, most DIY attempts fail here. Glossy finishes resist adhesion; sanding creates texture for primer and paint to grip.
Use 150-220 grit sandpaper with light pressure to dull the gloss without damaging the finish. Sand with the grain using a sanding block. Wipe all dust with a tack cloth, dust left on the surface creates weak adhesion points.
Best Primer for Kitchen Cabinets
Primer choice makes or breaks preventing paint peeling on kitchen cabinets. Standard latex primer fails on cabinets, they’re glossy, often laminate or veneer, and experience heat and moisture stress that interior walls don’t.
Bonding Primers vs. Standard Primers
Bonding primers contain adhesion-promoting resins that chemically bond to glossy, non-porous surfaces. For kitchen cabinets, bonding primer is not optional, it’s the difference between paint that lasts and paint that peels.
Substrate-Specific Primer Selection
Solid wood: Use water-based bonding or alkyd primer. Allow 2-4 hours drying between coats.
Laminate and veneer: Require bonding primer for non-porous surfaces. Standard primers fail within months. Use primers labelled “high-adhesion” or “bonding primer for plastic and laminate.” Apply two thin coats; one thick coat will sag.
MDF: Use bonding primer rated for MDF. Allow 4-6 hours drying between coats due to the material’s density.
Melamine: Requires high-adhesion bonding primer for plastic surfaces. Standard primers fail almost immediately.
Environmental Factors Affecting Primer Performance
Humidity: Above 60% humidity slows primer drying significantly. Allow 50% extra drying time between coats. Above 70%, run a dehumidifier during priming and painting.
Temperature: Below 15°C, primers take twice as long to cure. Extend drying times by 24-48 hours in cold kitchens. Warm primer slightly if below 18°C.
Heat exposure: Avoid oven or cooktop use for 48 hours after priming. Keep range hoods off during application and drying to prevent uneven curing.
Application Best Practices for Maximum Adhesion
Apply bonding primer in two thin coats using a quality brush or foam roller. Thick coats sag and create weak adhesion. Allow proper drying time between coats: water-based primers need 6-8 hours, alkyd primers 8-16 hours. Rushing this stage causes peeling months later.
Applying Paint and Ensuring Adhesion
Use cabinet paint in two thin coats with full drying time between. Thick paint doesn’t cure uniformly and causes peeling. Use quality brushes or foam rollers designed for cabinet work; cheap brushes shed bristles and create texture. Foam rollers provide smoother finishes than traditional brushes on flat cabinet surfaces.
How Long Does Kitchen Cabinet Paint Take to Cure
Curing time separates success from failure. Paint that looks dry isn’t cured. Understanding surface-dry vs. fully cured paint and how kitchen environment affects curing is essential to preventing peeling.
Surface-Dry vs. Fully Cured Paint
Surface-dry paint takes 4-8 hours; full cure takes 7-14 days for acrylics, 14-21 days for alkyds. During curing, heat, moisture, and use stress the coating. Paint that appears dry can still be soft underneath, causing adhesion failure weeks later.
How Kitchen Ventilation Affects Curing Time
Range hoods: Keep off during application and first 24 hours. After 24 hours, run 2-3 hours daily to accelerate curing. Without a range hood, curing time increases 30-50%. Open windows during and after cooking for cross-ventilation.
Humidity control: Above 60% slows hardening. Minimise dishwasher use and close bathroom doors during curing week. Above 65%, run a dehumidifier to reduce humidity to 40-50%, cutting curing time by 20-30%.
Temperature and Curing Speed
Optimal temperature: 18-25°C. Below 15°C, curing slows dramatically. Use gentle heating (space heater at least 1 metre from cabinets) to maintain 20°C or above. Avoid peak summer heat (above 30°C) which causes rapid, uneven drying.
Activity Restrictions During Curing
Keep cabinets closed and avoid heavy kitchen use for at least 7 days after the final coat. This is not optional if you want paint that lasts.
Cooking and heat: Don’t run the oven or cooktop heavily for at least a week. Steam and heat accelerate stress on uncured paint. If you must cook, use the range hood and keep cooking time brief. Sustained heat before curing is complete causes blistering and adhesion failure.
Dishwasher use: The dishwasher generates significant steam. Avoid running it for at least 5 days after final coat. If you must use it, run it on a short cycle and ensure the kitchen is well-ventilated during and after.
Cabinet access: Avoid opening and closing cabinet doors frequently. Each opening and closing flexes the paint layer slightly. Repeated flexing before curing is complete stresses adhesion. If you need items from cabinets, open them slowly and minimise the number of times you access them during the curing week.
Moisture sources: Avoid splashing water on cabinets during curing. Wipe up any spills immediately. Water exposure before curing is complete can cause blistering and soft spots in the paint.
Extended Curing in High-Moisture Kitchens
Kitchens with chronic moisture problems, poor ventilation, high humidity, or proximity to bathrooms, benefit from extended curing time before heavy use.
In humid climates or kitchens without range hoods, allow 14 days minimum before normal use. In very humid conditions (above 70% humidity regularly), allow 21 days.
Curing Timeline Checklist
| Timeline | Action | Why It Matters |
|---|---|---|
| 0-24 hours | Keep kitchen closed, no cooking, no dishwasher | Allows initial film formation without disturbance |
| 24-48 hours | Minimal cooking, range hood off, windows closed | Paint is still soft; heat and air currents cause defects |
| 48 hours-7 days | Light cooking only, range hood can run, gentle ventilation | Paint is hardening; avoid moisture and heat stress |
| 7-14 days | Normal kitchen use, monitor for any soft spots | Paint approaches full hardness; extended curing in humid kitchens |
| 14+ days | Full use; paint is fully cured | Maximum hardness and water resistance achieved |
Common Paint Failure Mistakes to Avoid
Understanding what causes paint peeling helps you avoid the traps that catch most DIY attempts.
Long-Term Maintenance Schedule
Preventing paint peeling doesn’t end when the final coat dries. Maintenance extends cabinet paint life significantly.
| Stage | Key Action | Why It Matters |
|---|---|---|
| Cleaning | Degrease with TSP, remove wax residue | Eliminates adhesion barriers |
| Drying | Allow full moisture evaporation | Prevents blistering and peeling |
| Sanding | Scuff with 150-220 grit sandpaper | Creates texture for primer grip |
| Priming | Apply bonding primer (2 thin coats) | Locks paint to glossy surfaces |
| Painting | Apply cabinet paint (2 thin coats) | Provides colour and protection |
| Curing | Wait 7-14 days before heavy use | Allows paint to reach full hardness |
| Maintenance | Monthly wipe, quarterly deep clean | Prevents grease buildup and stress |
Frequently Asked Questions
What causes paint to peel on kitchen cabinets?
Paint peels when it loses adhesion to the substrate, typically due to inadequate surface preparation. Wax residue, grease, and glossy finishes prevent primer and paint from bonding properly. Moisture exposure, heat fluctuations, and curing in humid conditions also cause adhesion failure. Without proper degreasing and scuff sanding, even high-quality paint will eventually flake or chip, especially on high-use surfaces like cabinet doors and handles.
How long does kitchen cabinet paint take to cure?
Most cabinet paints cure fully within 7 to 14 days, depending on the paint type and environmental conditions. Water-based acrylic latex paints typically cure faster than solvent-based alkyds. Humidity and temperature significantly affect curing time; cooler, damp conditions slow the process. Allow at least 24 hours before light use and avoid heavy contact for the full curing period. Rushing use before complete cure causes chipping and peeling.
What is the best primer for kitchen cabinets?
Bonding primers specifically designed for glossy surfaces deliver superior adhesion on cabinets. These primers chemically bond to existing finishes, eliminating the need to sand away all old paint. For laminate cabinets, use a primer formulated for non-porous substrates. Alkyd-based bonding primers offer excellent durability, though water-based bonding primers are faster-drying and lower-odour. Always match primer type to your topcoat: acrylic latex primers work with latex paints, and solvent-based primers suit enamel finishes.
How should I clean kitchen cabinets before painting to prevent peeling?
Start by wiping cabinets with a degreaser or TSP solution using a microfibre cloth to remove grease, dust, and wax residue. Pay special attention to handles and areas near cooking surfaces. Rinse thoroughly with clean water and allow to dry completely. Follow with scuff sanding using fine-grit sandpaper (220-grit or higher) to dull the existing finish and improve surface tension for primer adhesion. A tack cloth removes all sanding dust before priming. This multi-step cleaning process is essential to prevent paint failure.