

Sep 2026 How to Protect Floors During Interior Painting
Table of Contents
- What You’ll Need Before You Start
- How to Protect Floors During Interior Painting: The Prep Steps
- The Best Drop Sheets for Painting Timber, Tile and Carpet
- Protecting Carpet From Paint Spills and Splatter
- Painting Skirting Boards Without Getting Paint on Floor
- Common Mistakes That Damage Floors
- Removing Coverings and Cleaning Up Without Damage
- Frequently Asked Questions
Last Updated: September 11, 2026
What You’ll Need Before You Start
Protecting floors during interior painting comes down to three things: the right surface protection materials, the right adhesive, and the right order of operations. Get those wrong and you’ll be sanding paint off timber floorboards for a weekend. At The Colour Palette, we’ve spent over 20 years painting homes and businesses, and the floor protection stage is where careful jobs separate themselves from rushed ones.
Here’s your kit list:
- Drop sheets: canvas for timber and tile, plastic sheeting for carpet
- Painter’s tape: low-tack adhesive, in widths from 24mm to 48mm
- Protective film: self-adhesive polyethylene film for hard surfaces
- Kraft paper or hardboard: for high-traffic zones and furniture legs
- Old towels or rags: for immediate paint spill cleanup
- A utility knife and scraper: for trimming and lifting coverings
- Non-slip mats: for any walkway over a covered surface
Buy low-tack painter’s tape rather than masking tape. Masking tape bonds harder the longer it sits, and on a freshly sealed floor it can lift the finish when you peel it off. Low-tack tape is designed to release cleanly for days, not hours.
How to Protect Floors During Interior Painting: The Prep Steps
Learning how to protect floors during interior painting starts before a single drop sheet hits the ground. The prep is unglamorous, but it decides whether you spend cleanup time wiping or repairing. The two things most guides skip are surface compatibility and how long a covering can safely stay down.
Clear the Room and Check the Surface
Move furniture out entirely where you can. What stays gets pulled to the centre of the room and wrapped in plastic sheeting, with the wrap taped to itself rather than the furniture legs.
Then inspect the floor. Sweep or vacuum first, because grit trapped under a drop sheet will scratch a timber finish as you walk across it. Check for existing scratches, loose tiles, or lifting vinyl so you know what was already there. A quick phone photo of each floor before you start is cheap insurance if a dispute ever comes up.
Match your covering to the finish, not just the floor type:
- Oil-finished or waxed timber: avoid self-adhesive film entirely. The adhesive can bond to the oil and pull the finish when removed. Use canvas or kraft paper held with low-tack tape on the skirting, not the floor.
- Luxury vinyl plank (LVP): plastic sheeting is fine, but never tape directly to the plank surface. LVP wear layers can cloud or lift under aggressive adhesive. Tape to the skirting or use weighted battens.
- Polished concrete and sealed stone: kraft paper or hardboard is safer than film, because film traps moisture against the sealer and can leave a haze.
- Carpet: plastic first, canvas over the top. Never tape plastic to carpet fibre; tape the seam to itself.
Lay Down Your Protection in Order
Work from the wall outward, in this sequence:
- Tape the baseboard or skirting line first, so the floor covering tucks under the tape edge.
- Roll out your drop sheet from the furthest corner back toward the door.
- Overlap sheets by at least 300mm and tape the seams.
- Tape the sheet edges down, but never tape directly to a freshly coated or newly polished floor.
- Add a second layer of protection in the work zone around ladders and paint tins.
Know Your Safe-to-Leave-On Timeline
This is the detail most guides leave out, and it is where long jobs go wrong. Protective films and tapes are not designed to sit indefinitely.
- Low-tack painter’s tape: most manufacturers rate clean removal for around 7 to 14 days on interior surfaces. Beyond that, adhesive residue and edge lift become likely, especially in warm rooms.
- Self-adhesive protective film: treat 14 days as a practical ceiling. UV through windows, heat from drying paint, and foot traffic all accelerate adhesive transfer.
- Plastic sheeting (non-adhesive): safe for weeks, but lift it every few days to let moisture escape. Trapped moisture under plastic can mark timber and encourage mould in humid conditions.
- Canvas drop sheets: reusable indefinitely, but shake and re-lay daily so grit doesn’t grind into the finish.
If a job will run longer than two weeks, plan to lift and re-lay coverings at least once, and re-tape with fresh low-tack tape rather than leaving the original strip down.
Never leave self-adhesive film on a freshly sealed or oiled floor for the duration of a multi-week renovation. Adhesive residue on these finishes is difficult to remove without dulling the surface, and the damage often only shows up weeks later.
The Best Drop Sheets for Painting Timber, Tile and Carpet
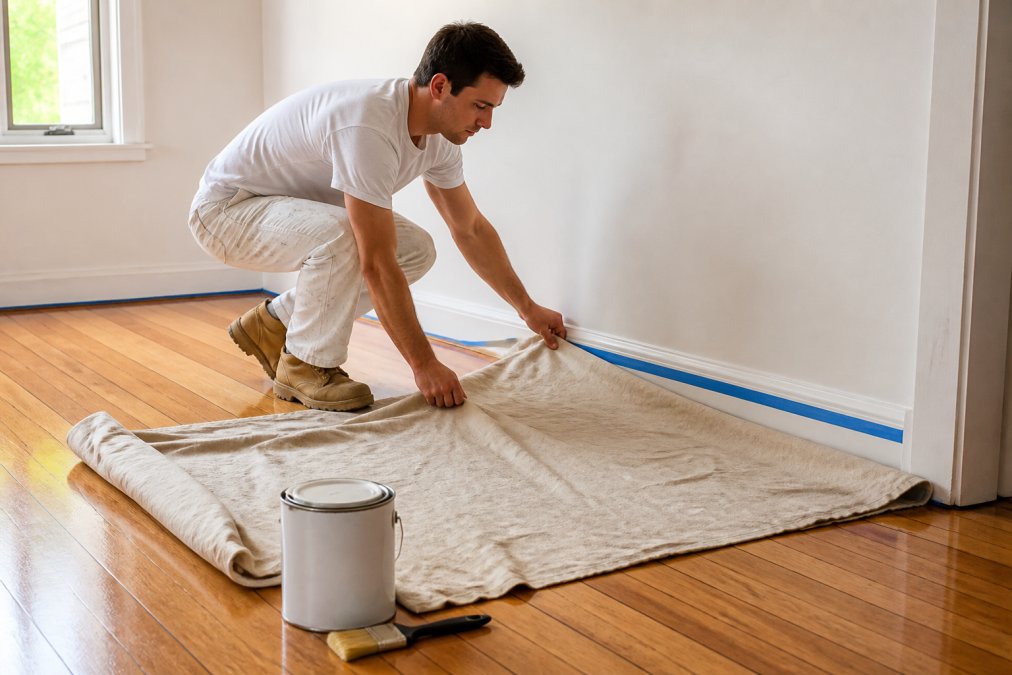
The best drop sheets for painting depend entirely on the floor underneath them. There is no single material that suits every surface, and using the wrong one causes more damage than it prevents.
| Floor Type | Best Covering | Why | Watch Out For |
|---|---|---|---|
| Timber | Canvas drop sheet | Breathable, stays put, no plastic sweat | Grit underneath causes scratches |
| Tile | Canvas or polyethylene film | Wipeable, handles drips | Film gets slippery when wet |
| Carpet | Plastic sheeting plus canvas | Plastic blocks spills, canvas stops slipping | Plastic alone traps moisture |
| Polished concrete | Kraft paper or hardboard | Protects against impact and scuffs | Tape residue on sealed surfaces |
Canvas is the workhorse. It absorbs small drips, doesn’t slide underfoot, and can be reused for years. Polyethylene film is the spill barrier: nothing soaks through it, which is exactly what you want over carpet. Hardboard earns its place under ladders and around furniture legs, where a dropped tin would otherwise dent or crack a hard surface.
Never rely on a single layer of thin plastic over carpet. A split seam or a pinhole from a ladder foot lets paint straight through to the fibres, and water-based paint sets fast. Always double up in the area where you’re actually working.
Protecting Carpet From Paint Spills and Splatter
Protecting carpet from paint spills means blocking the spill before it reaches the fibre, then acting within seconds if it does. Carpet is the least forgiving floor in the house because paint wicks downward and sideways almost immediately.
Layer it properly. Start with plastic sheeting directly on the carpet, taped at the seams and run up the wall by 100mm. Then lay canvas over the top so you’re not walking on slick plastic. The plastic catches the spill; the canvas stops you from slipping on it.
If paint does reach the carpet:
- Blot, don’t rub. Rubbing pushes pigment deeper into the pile.
- Work from the outside of the stain inward to stop it spreading.
- Use cool water for water-based paint, and act before it dries.
- For oil-based paint, you’ll need a solvent-based cleaner, and you should test it on a hidden patch first (extension.psu.edu).
Painting Skirting Boards Without Getting Paint on Floor
Painting skirting boards without getting paint on the floor is mostly a taping discipline. The brush technique matters, but the tape line is what saves the floor.
Run a strip of low-tack painter’s tape along the floor where it meets the skirting, pressing the edge down firmly so paint can’t creep underneath. Then tape the top edge of the skirting against the wall. You now have a clean channel to work in.
Load your brush lightly. A brush that’s too wet is the single biggest cause of paint running down the skirting and pooling at the tape line. Cut in with the top third of the bristles, keep a steady line, and pull the tape while the paint is still slightly tacky. If you wait until it’s fully cured, the tape will tear the paint edge instead of releasing cleanly.
Pull painter’s tape at roughly a 45-degree angle, slowly, while the paint is touch-dry but not fully cured. This single habit prevents most of the ragged edges and lifted finish that people blame on the paint itself.
Common Mistakes That Damage Floors
The damage usually isn’t the paint. It’s the protection setup, and it fails in predictable ways.
- Taping directly to a finished floor. Low-tack still bonds to fresh sealant and can lift it. Tape to the covering, not the floor.
- Skipping the vacuum. Grit under a drop sheet acts like sandpaper every time you step on it.
- Leaving plastic film down for weeks. Some films and tapes leave adhesive residue the longer they stay, and trapped moisture can mark a timber finish.
- Single-layer coverage in the work zone. One layer is fine for a walkway. It’s not fine under a ladder.
- Walking paint through the house. Set up a designated exit path and cover it too, or you’ll find footprints in the hallway.
If you’re painting over several days, lift and re-lay your drop sheets each morning rather than leaving them taped down. It lets any moisture under plastic escape and gives you a chance to check for spills you missed.
Removing Coverings and Cleaning Up Without Damage
Removal is where a good job can still go wrong. Take it slowly and in the reverse order you laid everything down.
- Wait until the paint is fully dry to the touch before you move anything.
- Pull painter’s tape slowly at a 45-degree angle, back over itself.
- Lift drop sheets by the corners and fold them inward so loose dust and dried paint flakes stay contained.
- Check the floor for stray drips while the light is still good.
- Deal with adhesive residue immediately, using the method matched to your floor finish.
Floor-Specific Adhesive Residue Removal
Adhesive residue is the most common leftover, and the correct removal method depends entirely on the finish underneath. Using the wrong product can dull, cloud, or strip a floor that was perfectly fine before you started.
- Sealed timber and engineered boards: start with warm water and a few drops of mild dish soap on a microfibre cloth. Work in small circles. If residue persists, a dedicated adhesive remover labelled safe for polyurethane finishes is the next step. Test on a hidden patch first.
- Oil-finished or waxed timber: do not use soapy water, as it can strip the oil layer. Use a wax-compatible cleaner or a small amount of mineral spirits on a cloth, then re-wax the affected area. This is the finish most likely to show a permanent mark, so lift tape early rather than late.
- Luxury vinyl plank (LVP): warm soapy water is usually enough. Avoid solvents, acetone, and abrasive pads, which can scratch the wear layer or leave a matte patch on a gloss finish.
- Tile and grout: warm soapy water for most residue. For stubborn patches on ceramic or porcelain, isopropyl alcohol on a cloth works, but keep it off grout lines where it can dry out the cement.
- Polished concrete and sealed stone: warm water and a pH-neutral cleaner. Avoid acidic cleaners on stone, and avoid anything abrasive on polished concrete.
- Carpet: if tape residue transfers to pile, press a piece of fresh tape onto the spot and lift repeatedly to pull the residue up, then blot with warm water. Do not rub.
If you are unsure what finish is on a floor, test your removal method on a spot behind a door or under a piece of furniture that stays in place. It takes two minutes and prevents a very visible mistake.
Protecting the Baseboard and Trim Transition
The join between floor and skirting is where paint, tape, and two different finishes meet, and it is the single most common spot for damage. Handle it deliberately:
- Tape the skirting first, pressing the bottom edge firmly against the floor line so paint cannot creep under.
- When you pull that tape, pull it while the skirting paint is touch-dry, not fully cured. Cured paint tears at the floor line and leaves a ragged edge that is hard to touch up.
- If any paint does reach the floor at the transition, remove it while it is still soft with a plastic scraper and a damp cloth. A metal scraper will gouge timber and scratch tile.
- On timber, run a fingernail or a plastic card along the paint line before it fully dries to break the bridge between skirting and floor. This prevents the paint skin from pulling floor finish when the tape releases.
Disposal and Cleanup
For disposal, check whether your local council accepts dried paint and plastic sheeting through its recycling or household chemical program, because most kerbside bins won’t take either. Dried latex paint in a tin can often go in general waste once it is fully hardened; liquid paint should go to a council chemical drop-off (the EPA). Canvas drop sheets can be shaken out, washed if the manufacturer allows, and reused for years. Plastic sheeting that is heavily coated in paint is generally not recyclable and belongs in general waste.
Frequently Asked Questions
What do professional painters put on the floor before painting?
Most start with a heavy canvas drop sheet because it grips the surface, absorbs drips and can be reused. Over the top, many add a polyethylene film or hardboard in high-traffic zones. Edges are secured with low-tack painter’s tape so nothing shifts underfoot. The Colour Palette uses this layered approach on every interior job.
Should I use plastic or canvas drop sheets for floor protection?
Canvas for the base layer, plastic sheeting on top where splatter is likely. Canvas stays put, soaks up small drips and won’t tear on rough floorboards. Plastic is cheaper and fully waterproof, but it slides easily and paint stays wet on the surface, so anything that lands on it can be tracked further. Use both together and tape the plastic edges down with low-tack masking tape.
Can I use masking tape on floorboards without damaging the finish?
Yes, if you choose a low-tack painter’s tape and remove it within the recommended window, usually 24 to 72 hours depending on the product. Avoid general-purpose masking tape on polished timber or freshly coated floors, as its adhesive can leave residue or lift the finish. Test a small patch first, and peel tape back at a low angle rather than pulling straight up.
How do I protect carpet from paint spills during a painting project?
Lay canvas drop sheets over the carpet first, then overlap plastic sheeting on top so any spill sits on the plastic rather than soaking into fibres. Tape the edges down with low-tack tape and keep a damp cloth and warm soapy water nearby for immediate clean-up. If a spill does reach the carpet, blot it straight away rather than rubbing, and avoid letting paint dry before treating it.